slow fashion fixes: alterations, mends, and tips to get more out of the clothes you already own
As excited as I was for my trip to Austin, a glace at the weather forecast had me thinking "yikes!" While we were still enjoying 30 degree days up in Connecticut, Austin was posting temperatures in the 70's and 80's... summer weather for this New England girl. As I tried to wrap my brain around how I could afford even a few new summer pieces before my trip I knew I had to prioritize my expenses and really to the best to make good use of the clothing I already owned. Here are some tips and how-tos I picked up in the process.
1) purge and sort
I recommend sorting your e n t i r e wardrobe at least twice a year. It's nice to take inventory right before the seasons change you can begin to address the needs of your wardrobe before it's suddenly 70 degrees and you realize you have nothing to wear. I don't have many clothes to begin with, but I also don't have much space to keep my closet crowded with things that are not in use. This is how I sort out my clothing:
-get rid of / donate / swap / sell: Anything worn out and scraggly, anything that no longer suits your personal style or anything that makes you think "I should do better for myself". For me this category is mostly gross t shirts, exercise wear that doesn't fit and isn't flattering, and items I simply don't want and aren't worth altering. If you have a good amount of high quality clothing you're looking to remove from your wardrobe investigate local donation based thrift stores in your area as well as local clothing swap options or the growing number of apps that enable you to sell gently used pieces directly to other consumers.
-keep in storage: Things that you need, or sort of need, that should not be taking up space in your closet. Two sub categories... 1) things you keep for a specific purpose (re: summer camp, mission trips, anything you use, but not regularly, and fills a very specific need). I hang onto a pair of paint covered yoga pants to avoid dirtying up a new one, my sister keeps a mostly separate set of clothing for summer camp. 2) things you don't really need or want but they fit, they're in good shape and you never want to spend money on again. For me this is a pair of plain khaki pants and some basic button ups. I have them, don't wear them, probably never will wear them, but I'd rather tuck them away than frantically have to run to the GAP. I recommend keeping this category in proportion to the amount of storage you have.
-keep: Things you love! Things you wear! EVERYTHING IN THIS CATEGORY SHOULD BE A HELL YES. If you have things in this pile you don't love, that can't be remedied with an easy mend or alteration, you should probably get rid of it.
-mend / alter: I know we all have things in our closets that we wear that don't fit properly, or things we love that are worn, or pieces we like one aspect of but are not totally sold on. Keep this pile aside for now... we'll get back to it :)
2) Maybe the easiest wardrobe fix... placement!
I have a few summer button ups that I really like! But they were at the bottom of a pile in my closet meaning I often forgot I had them! I hung them up in plain sight so I will remember they're there. If you want to make more of an effort to wear a certain piece keep it somewhere you'll see it or be able to access it easily.
3) Alter and Mend
some basic mends and alterations you can do to make an item of clothing better serve you include: hemming, patching, and over dyeing with a household dye (RIT) or natural dyes. Some more advanced alteration techniques include adding darts, taking in a waistband, shortening sleeves (and probably many more I'm not familiar with) :)
Here are some examples of mends and alterations I've done to breathe new life into clothing I already own.
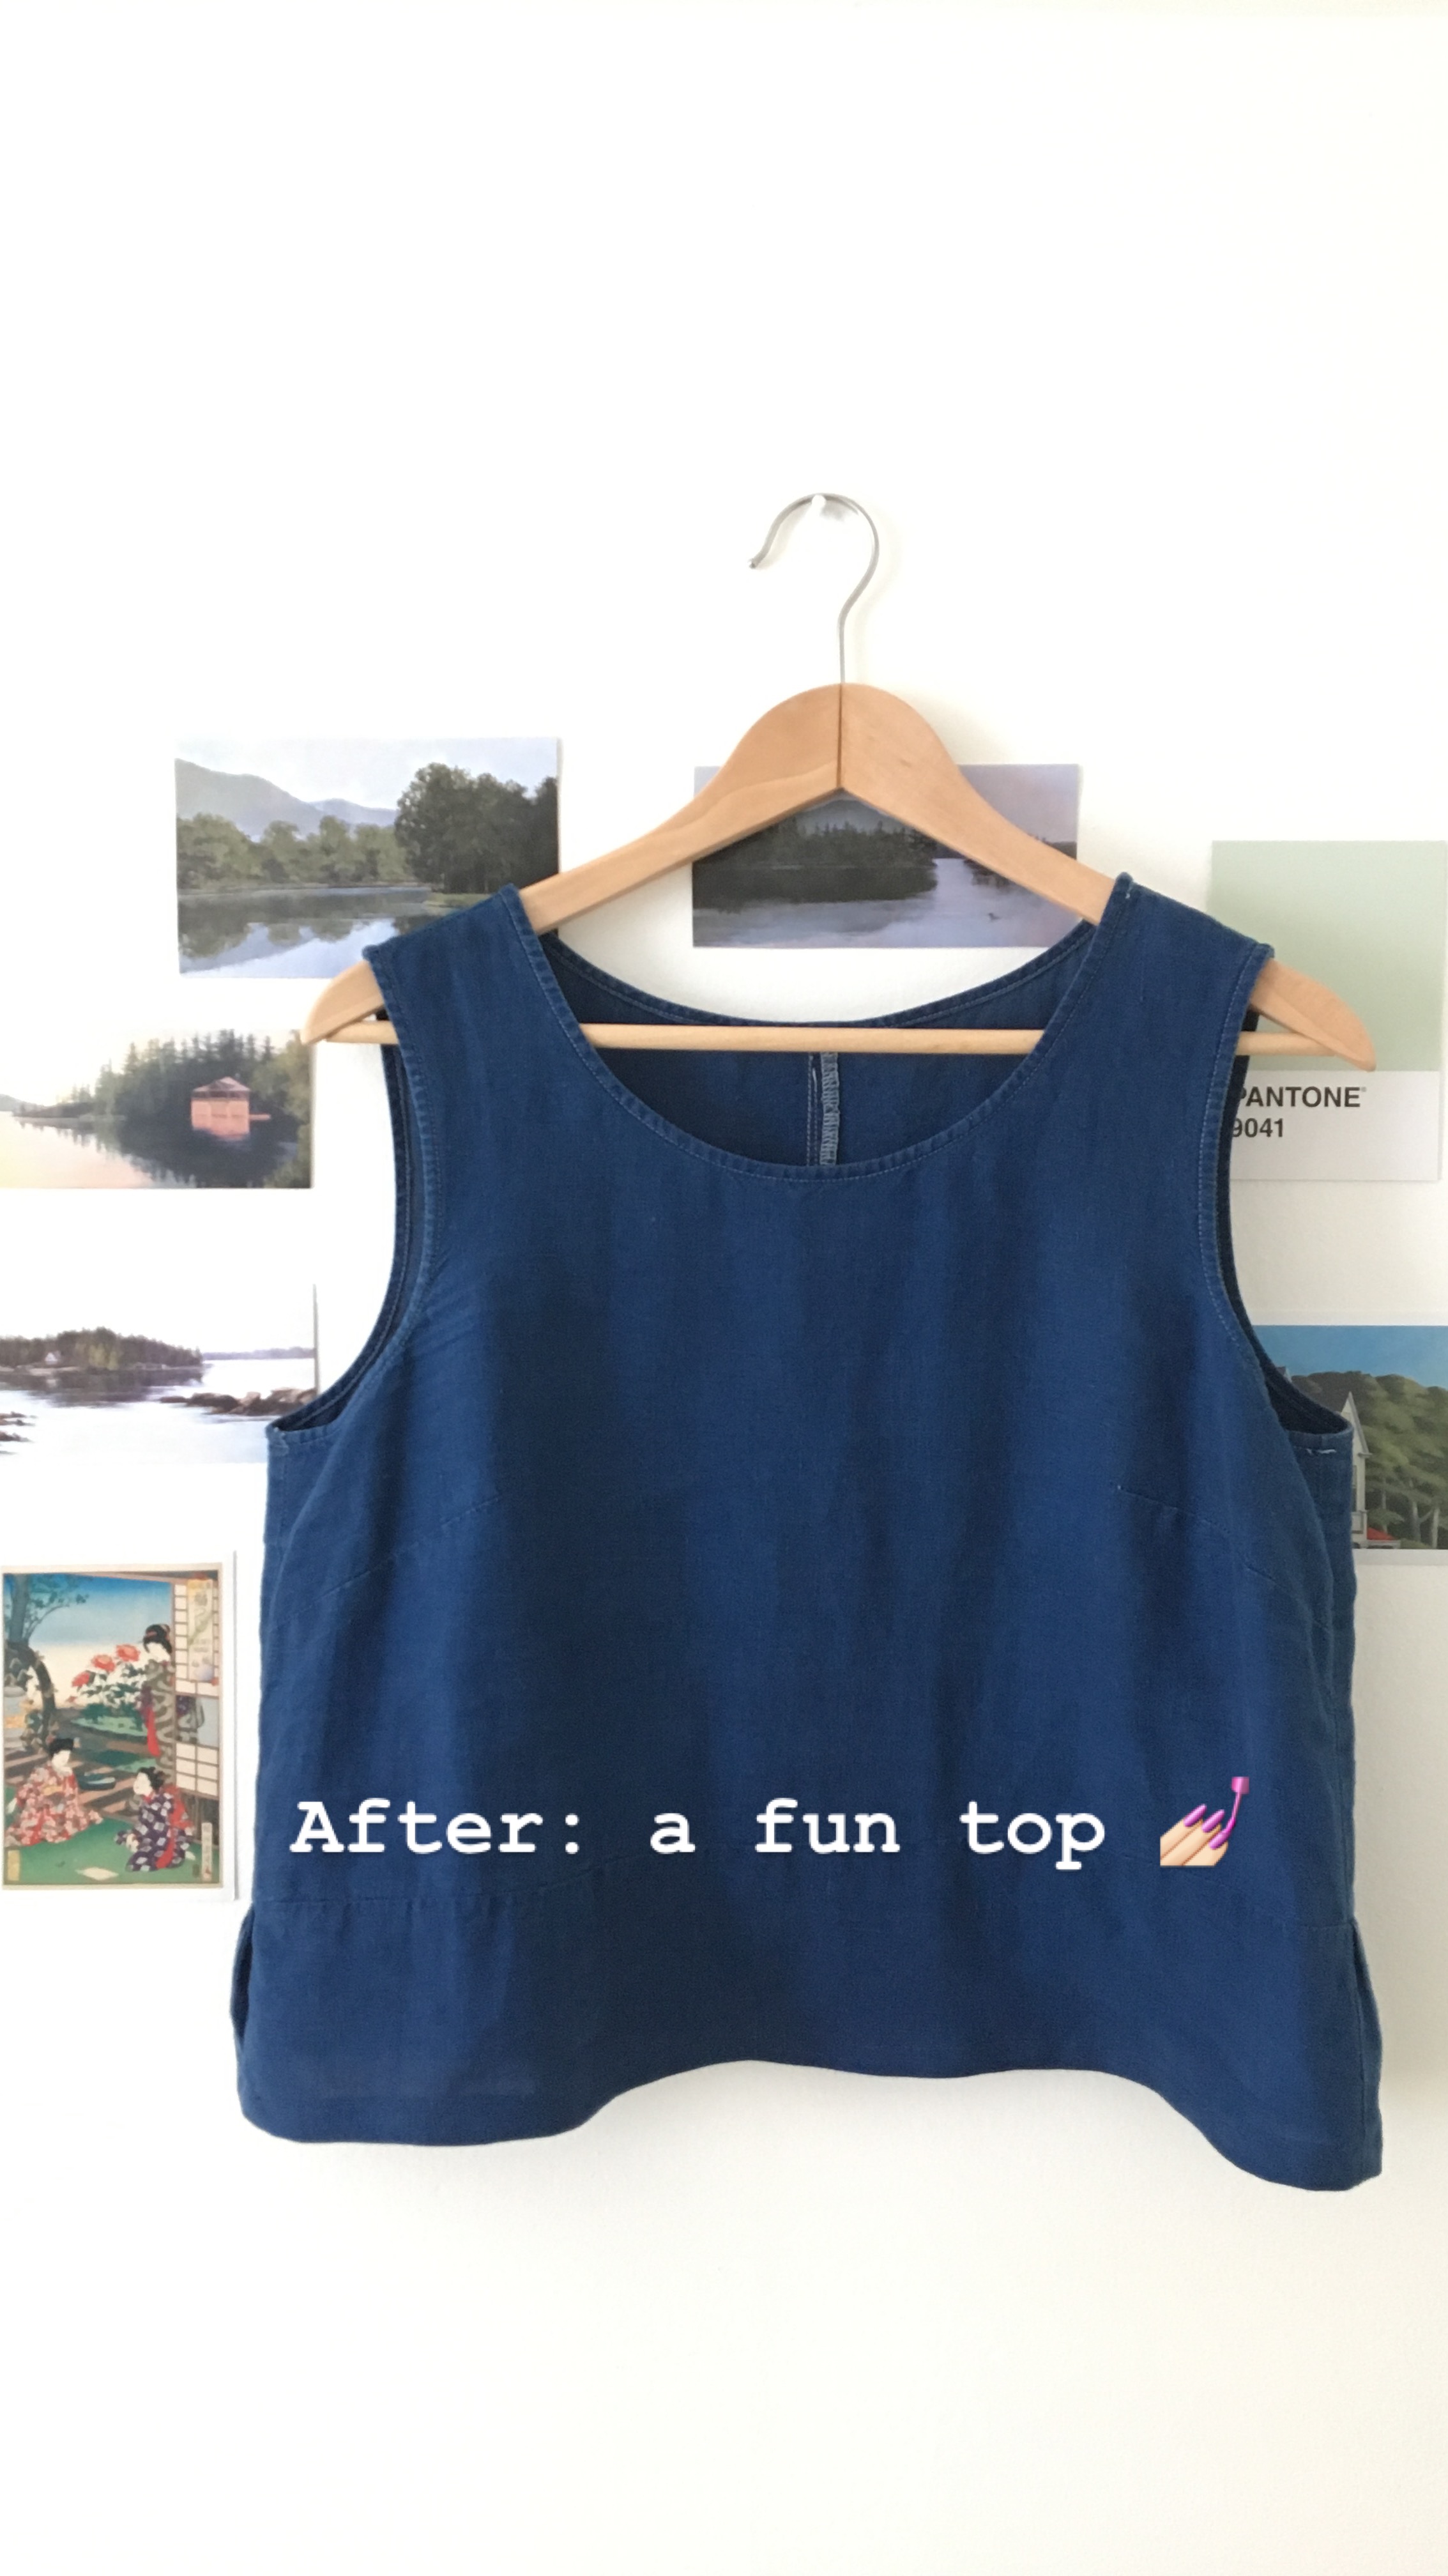
-Shortening a hem: turn a dress into a shirt. When I originally purchased this dress from Goodwill it was tan and a decent number of inches longer. The hips were originally too tight for me so I brought the skirt up at the waist and then indigo dyed the dress. It was certainly worked better for me than the piece I purchased but I still didn't wear it all that much. As a dress, it was pretty shapeless and did nothing for me. I decided to shorten it so the hem now hits just below my high waist. The shorter length made the piece much more youthful, something I can dress up or down depending on my needs.

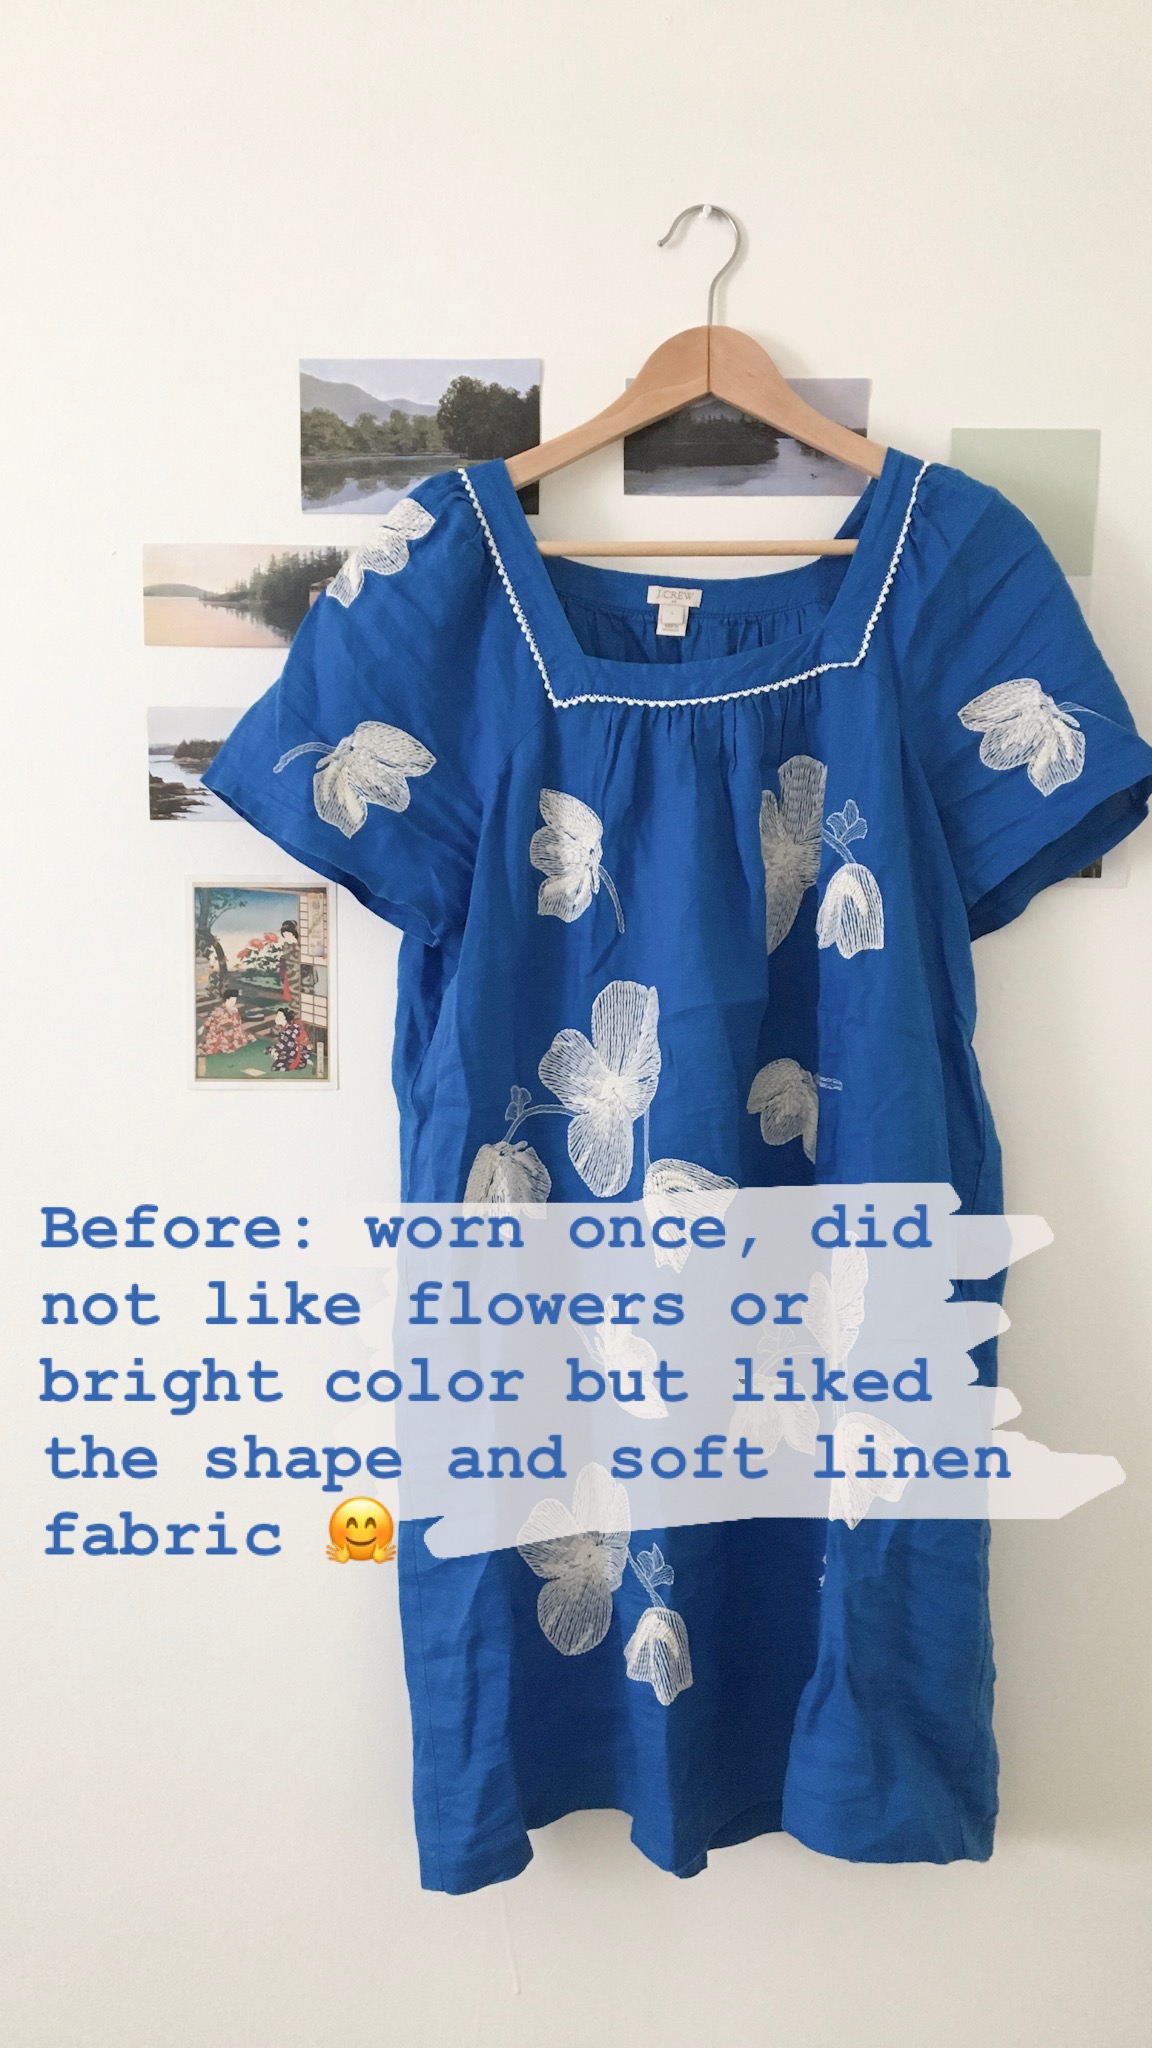
-Color change: re dyeing/over dyeing. I had 2 dresses in my "alter/mend" pile after sorting my closet that I like some aspects of but needed a little TLC for me to start wearing them regularly.
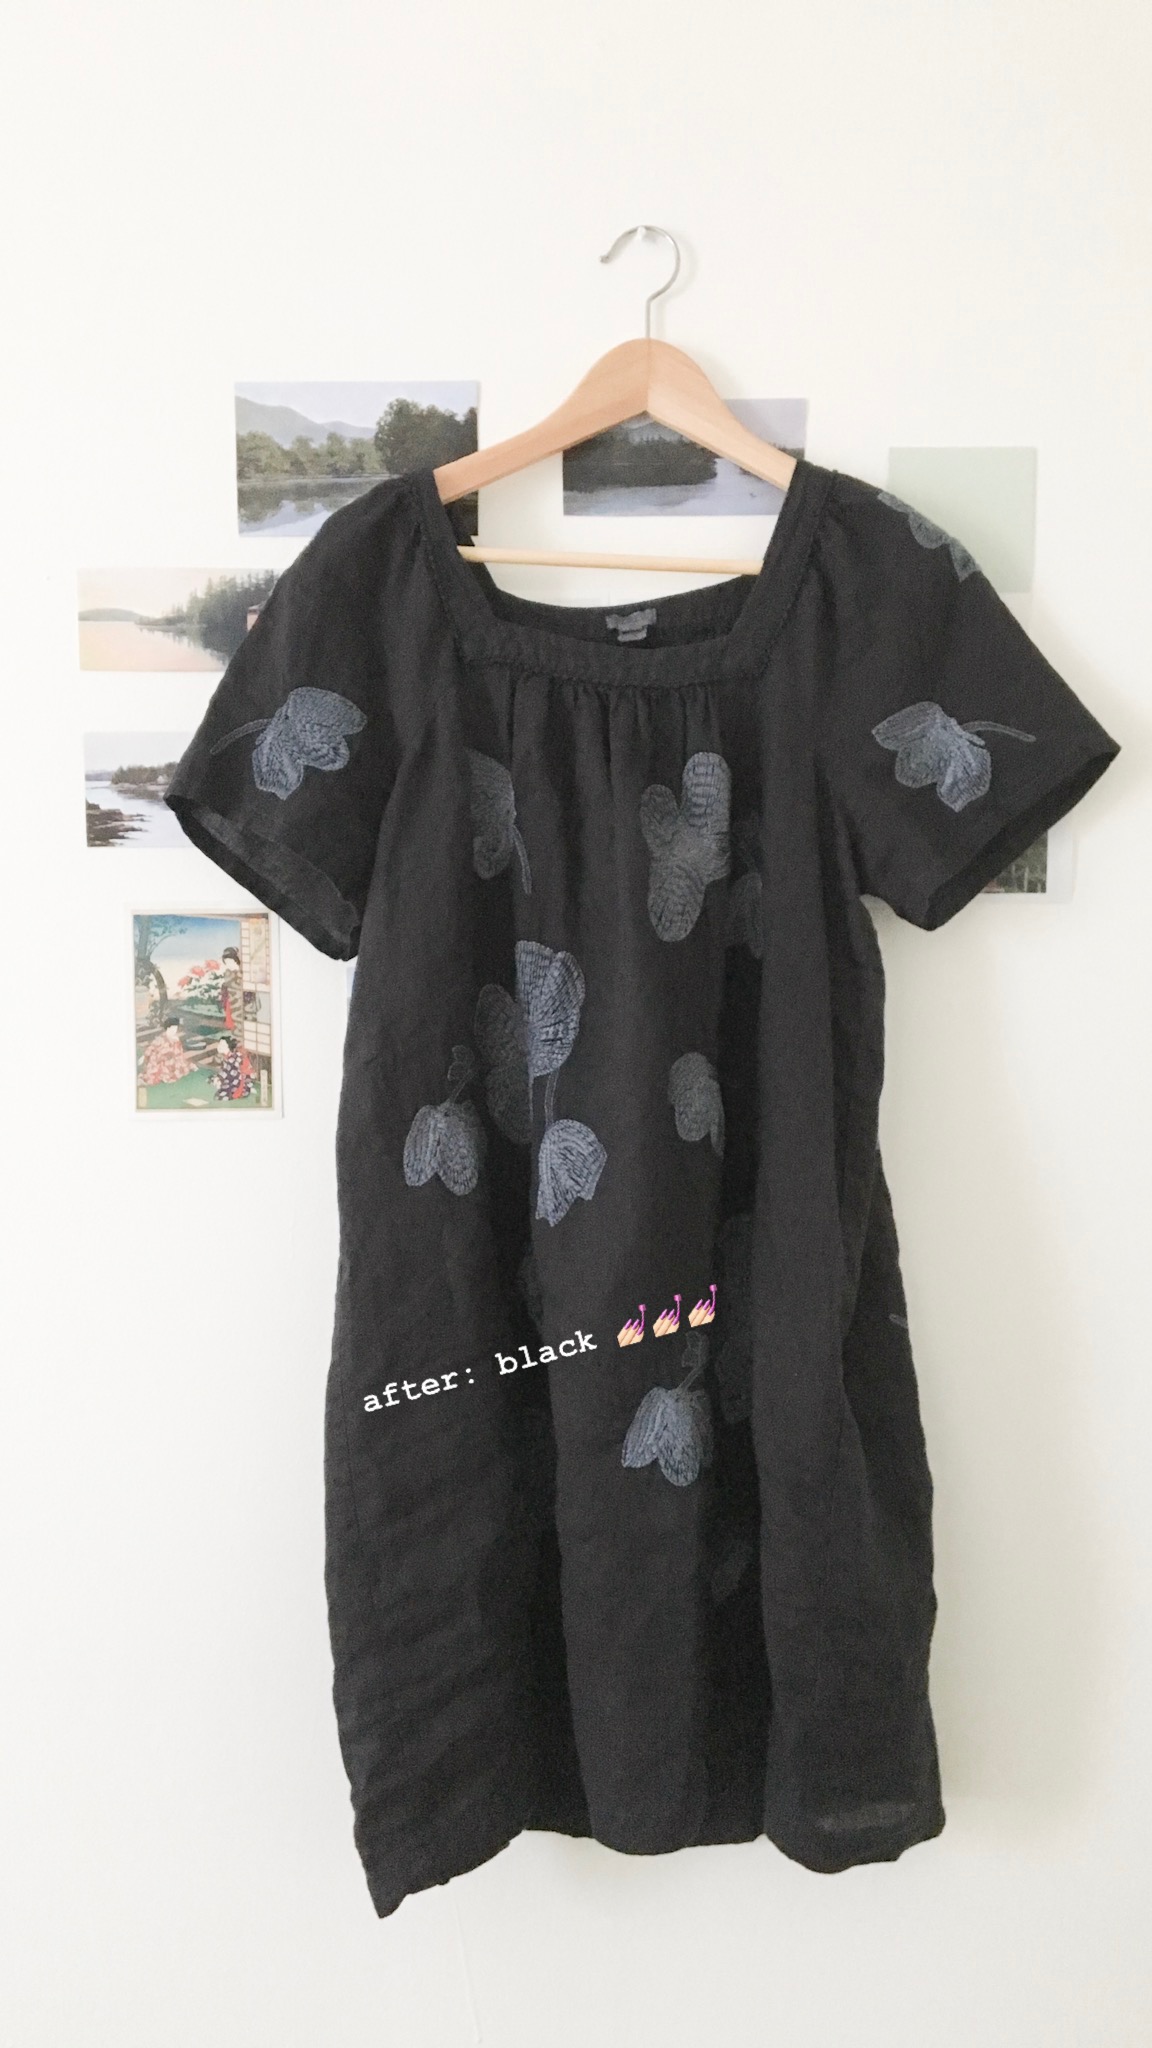
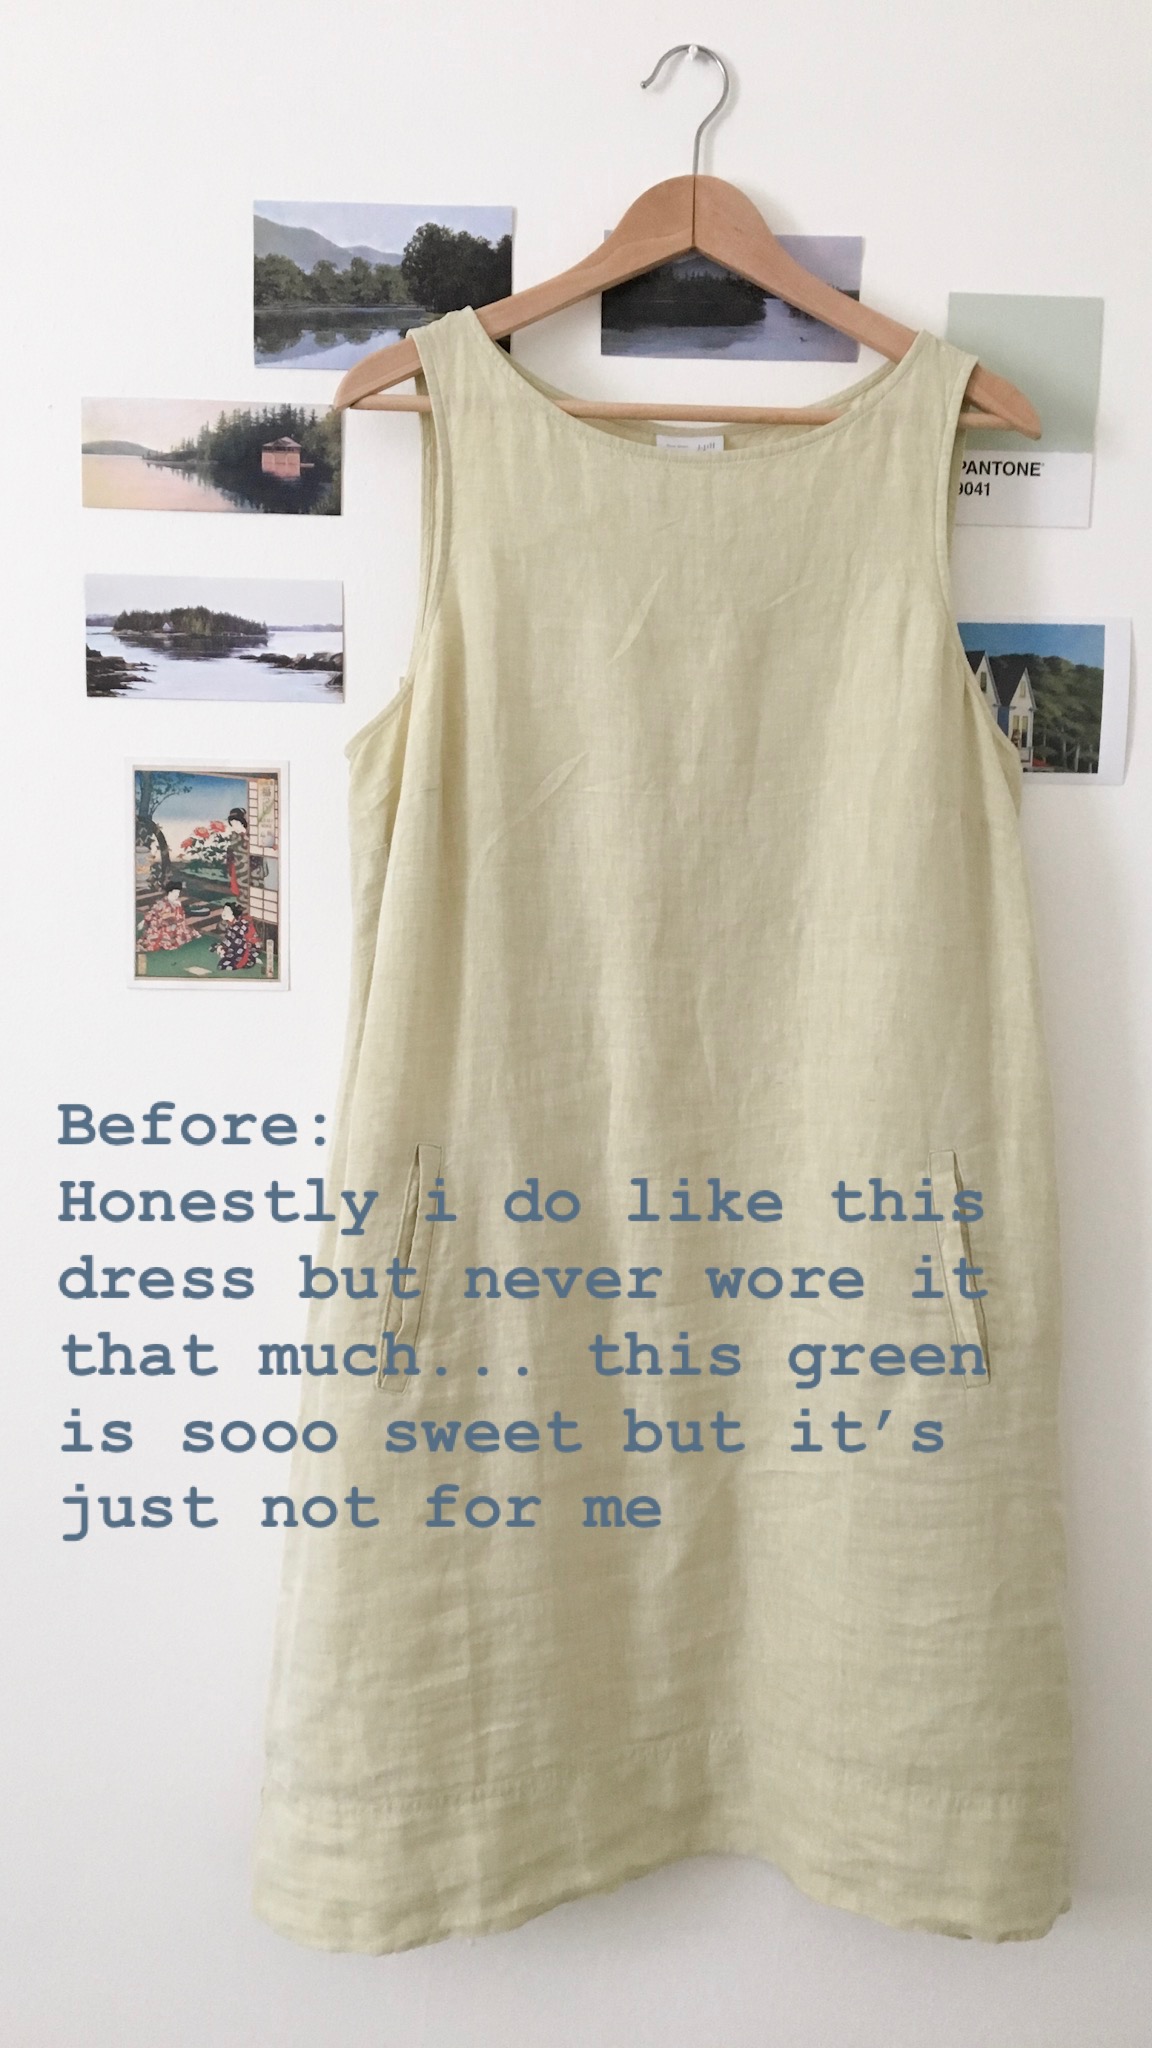
The first is this dress that I've only worn once. The flowers are not me at all and the blue is way to bright, but I like the shape and the linen is so soft. The solution? Dye it black!
The second is a dress I have gotten a fair amount of wear out of. Its nice linen, I like the shape, it's comfortable. And as much as I like the soft light green, I'm not big on pastels in my wardrobe and I just feel washed out whenever I put on the dress. I opted to dye this dress a rusty red/brown. I also shrunk it down a bit in the dryer and it now its much more flattering for me.

Redyeing is also a great way to spruce up your trusty pair of black jeans.
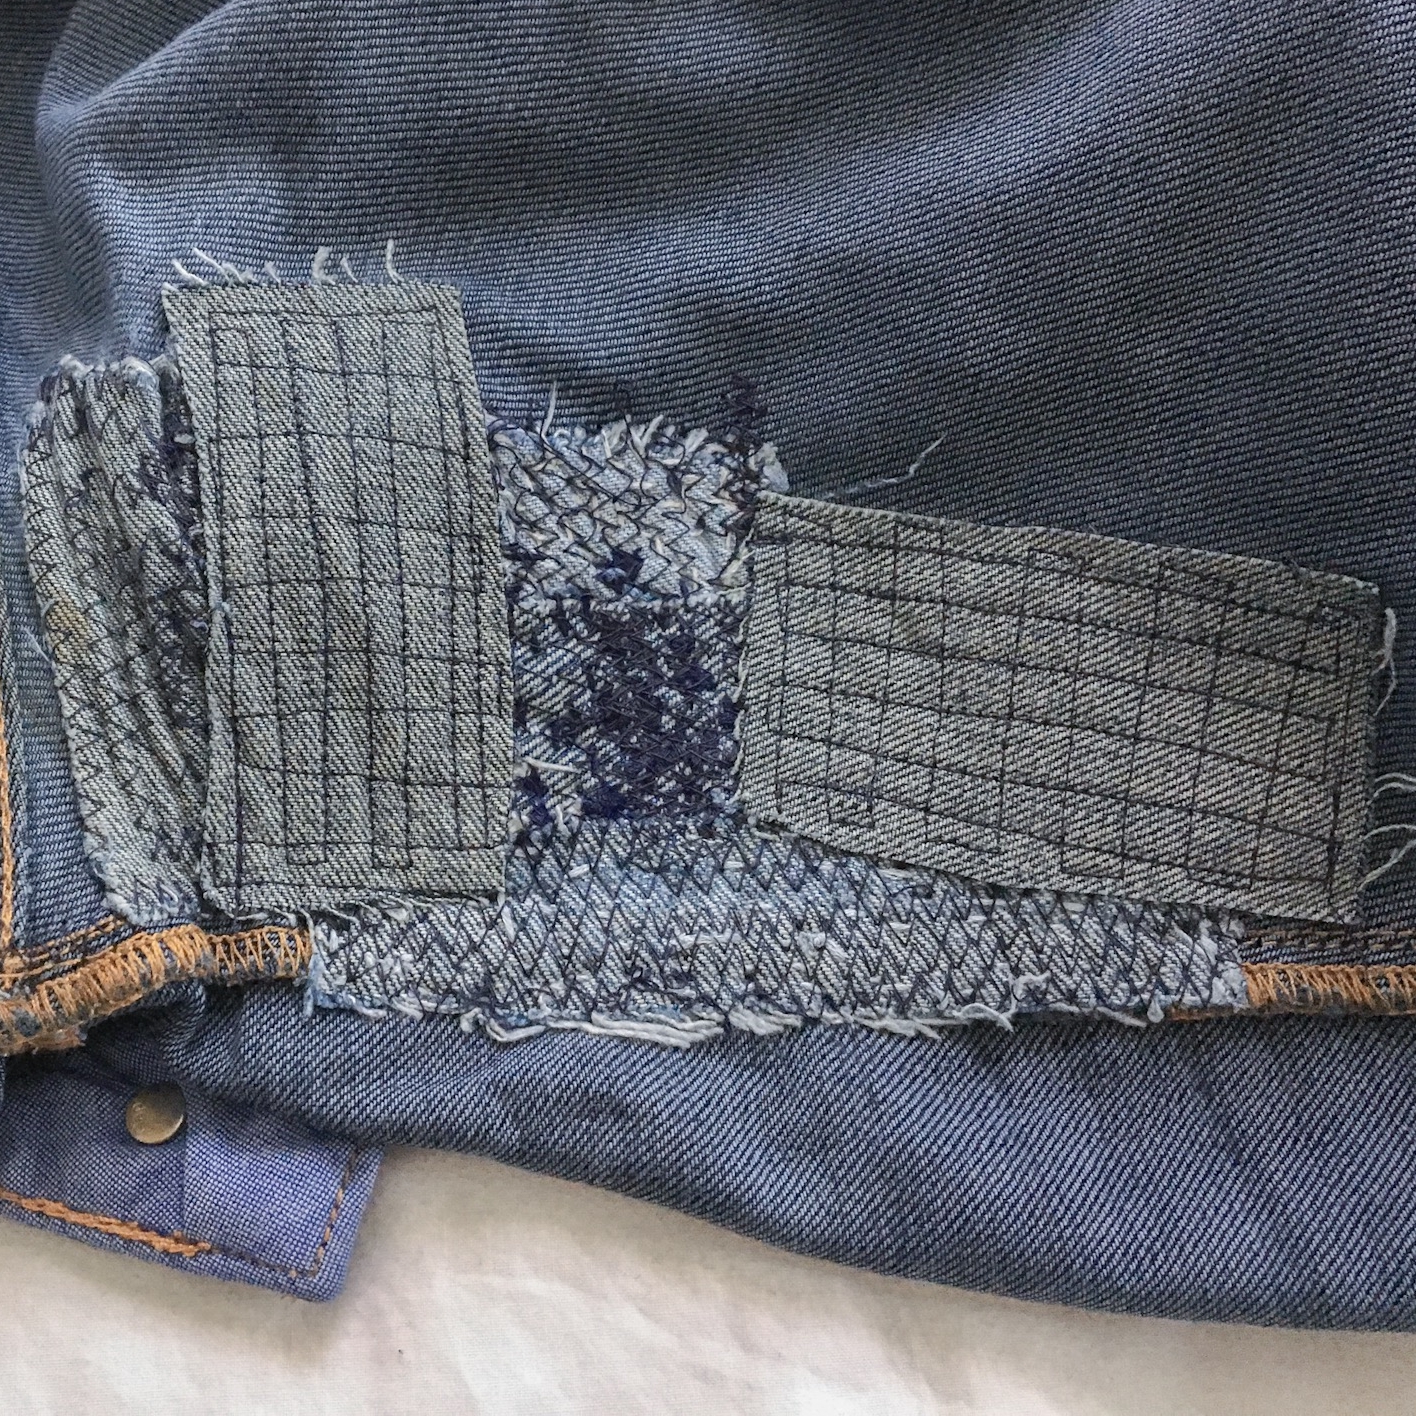
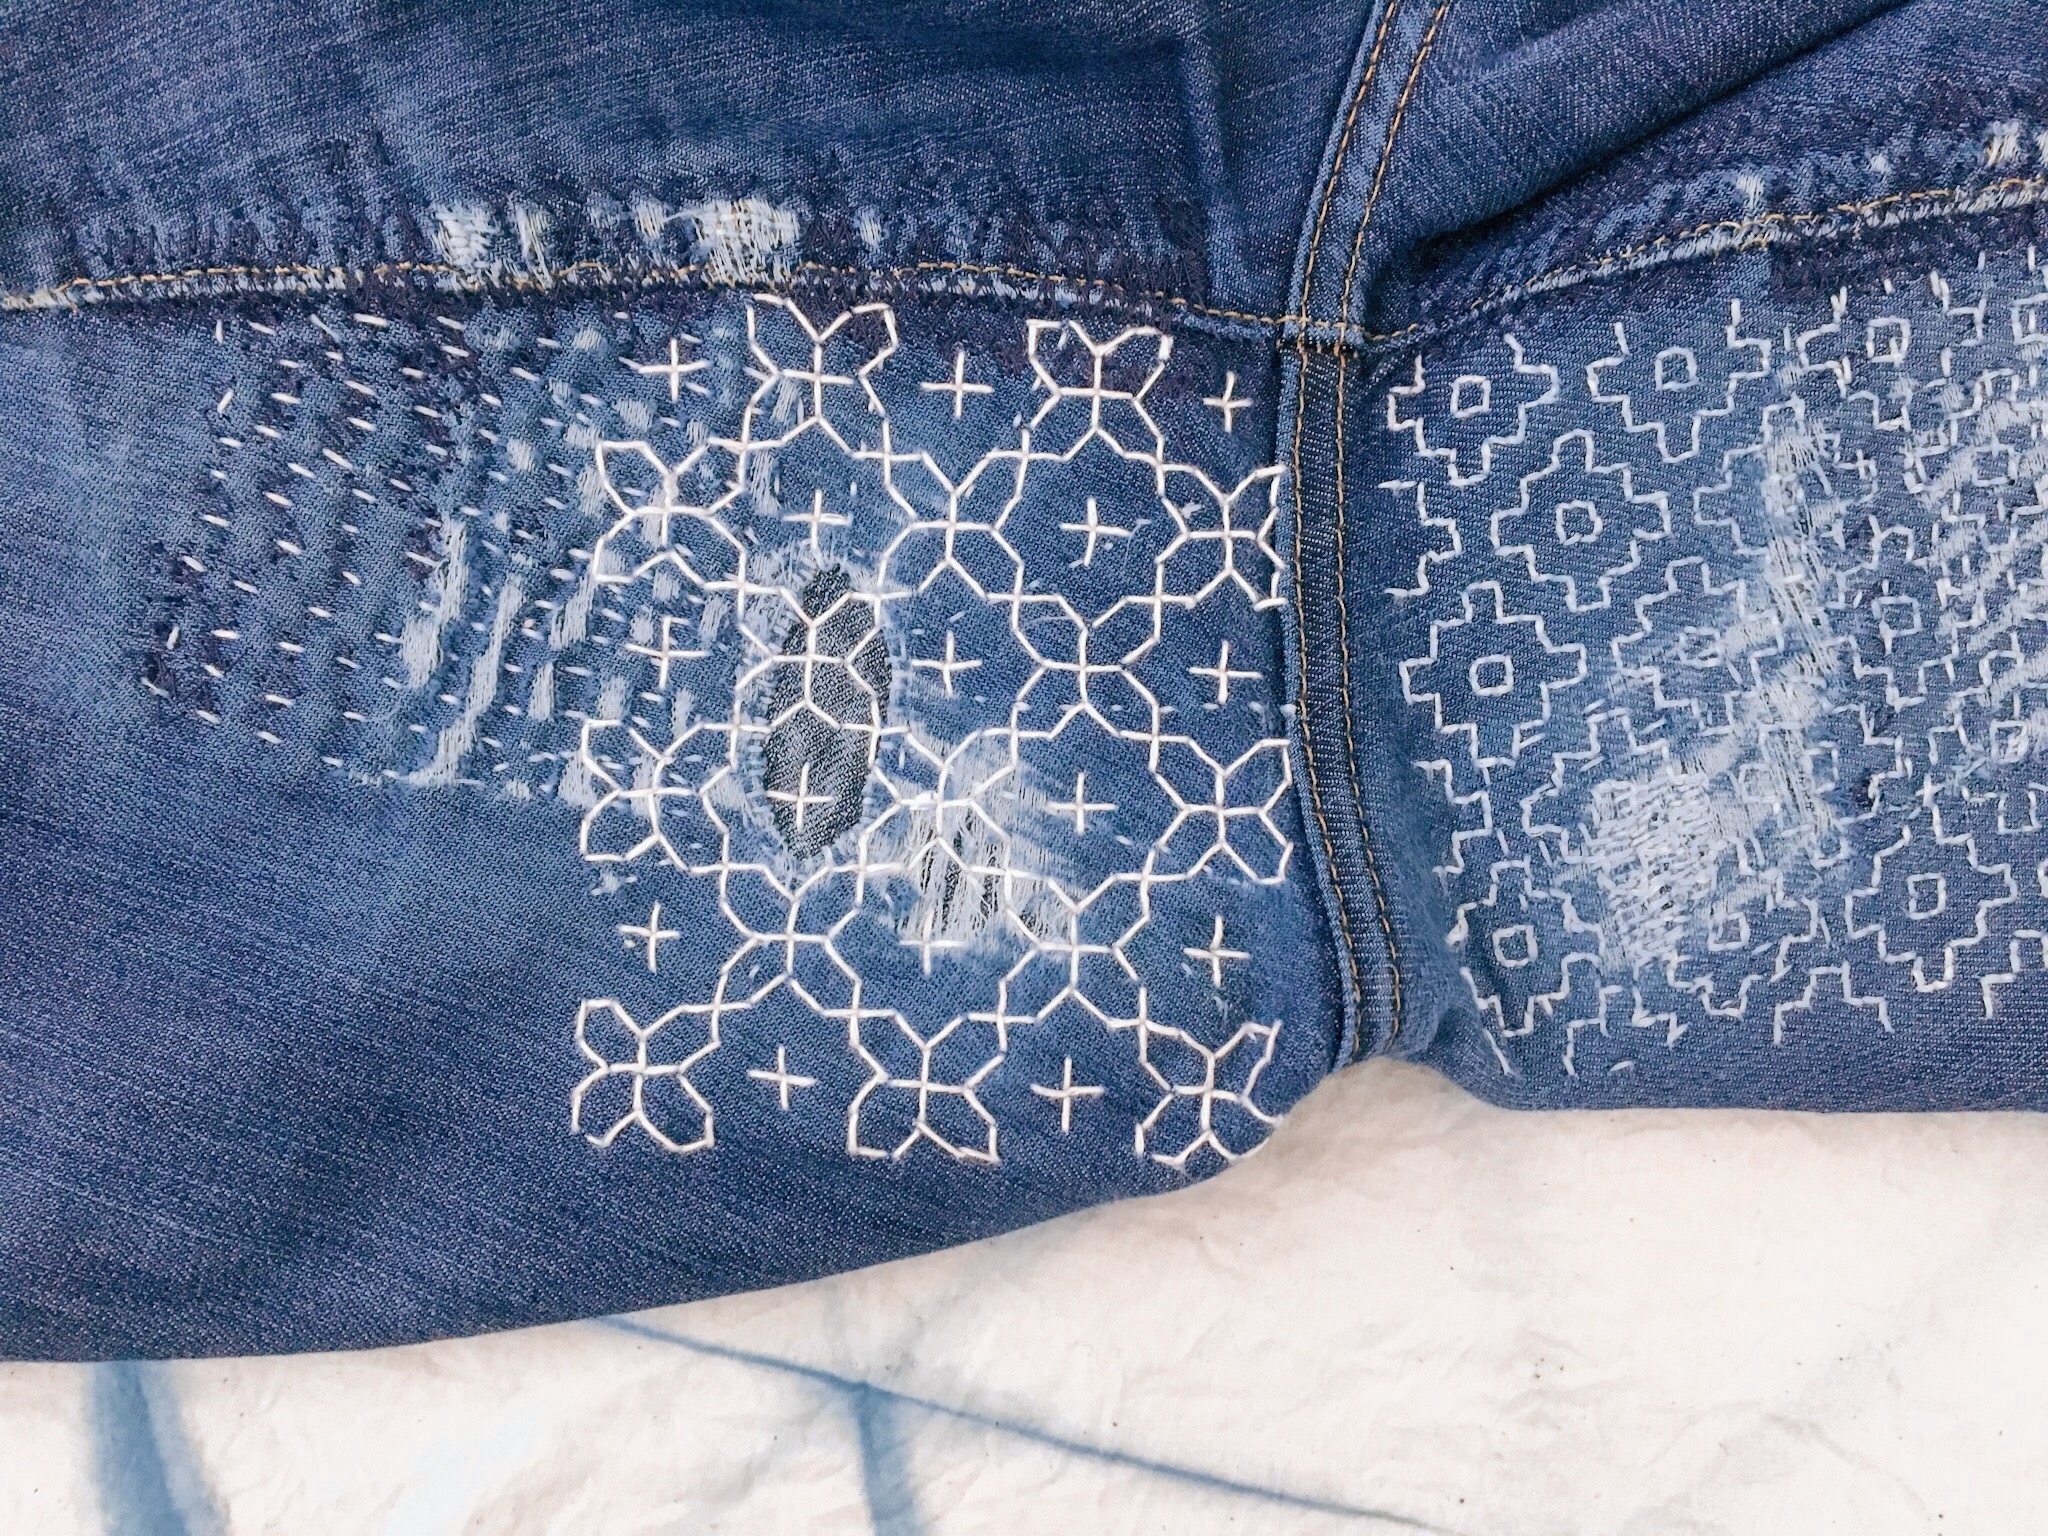
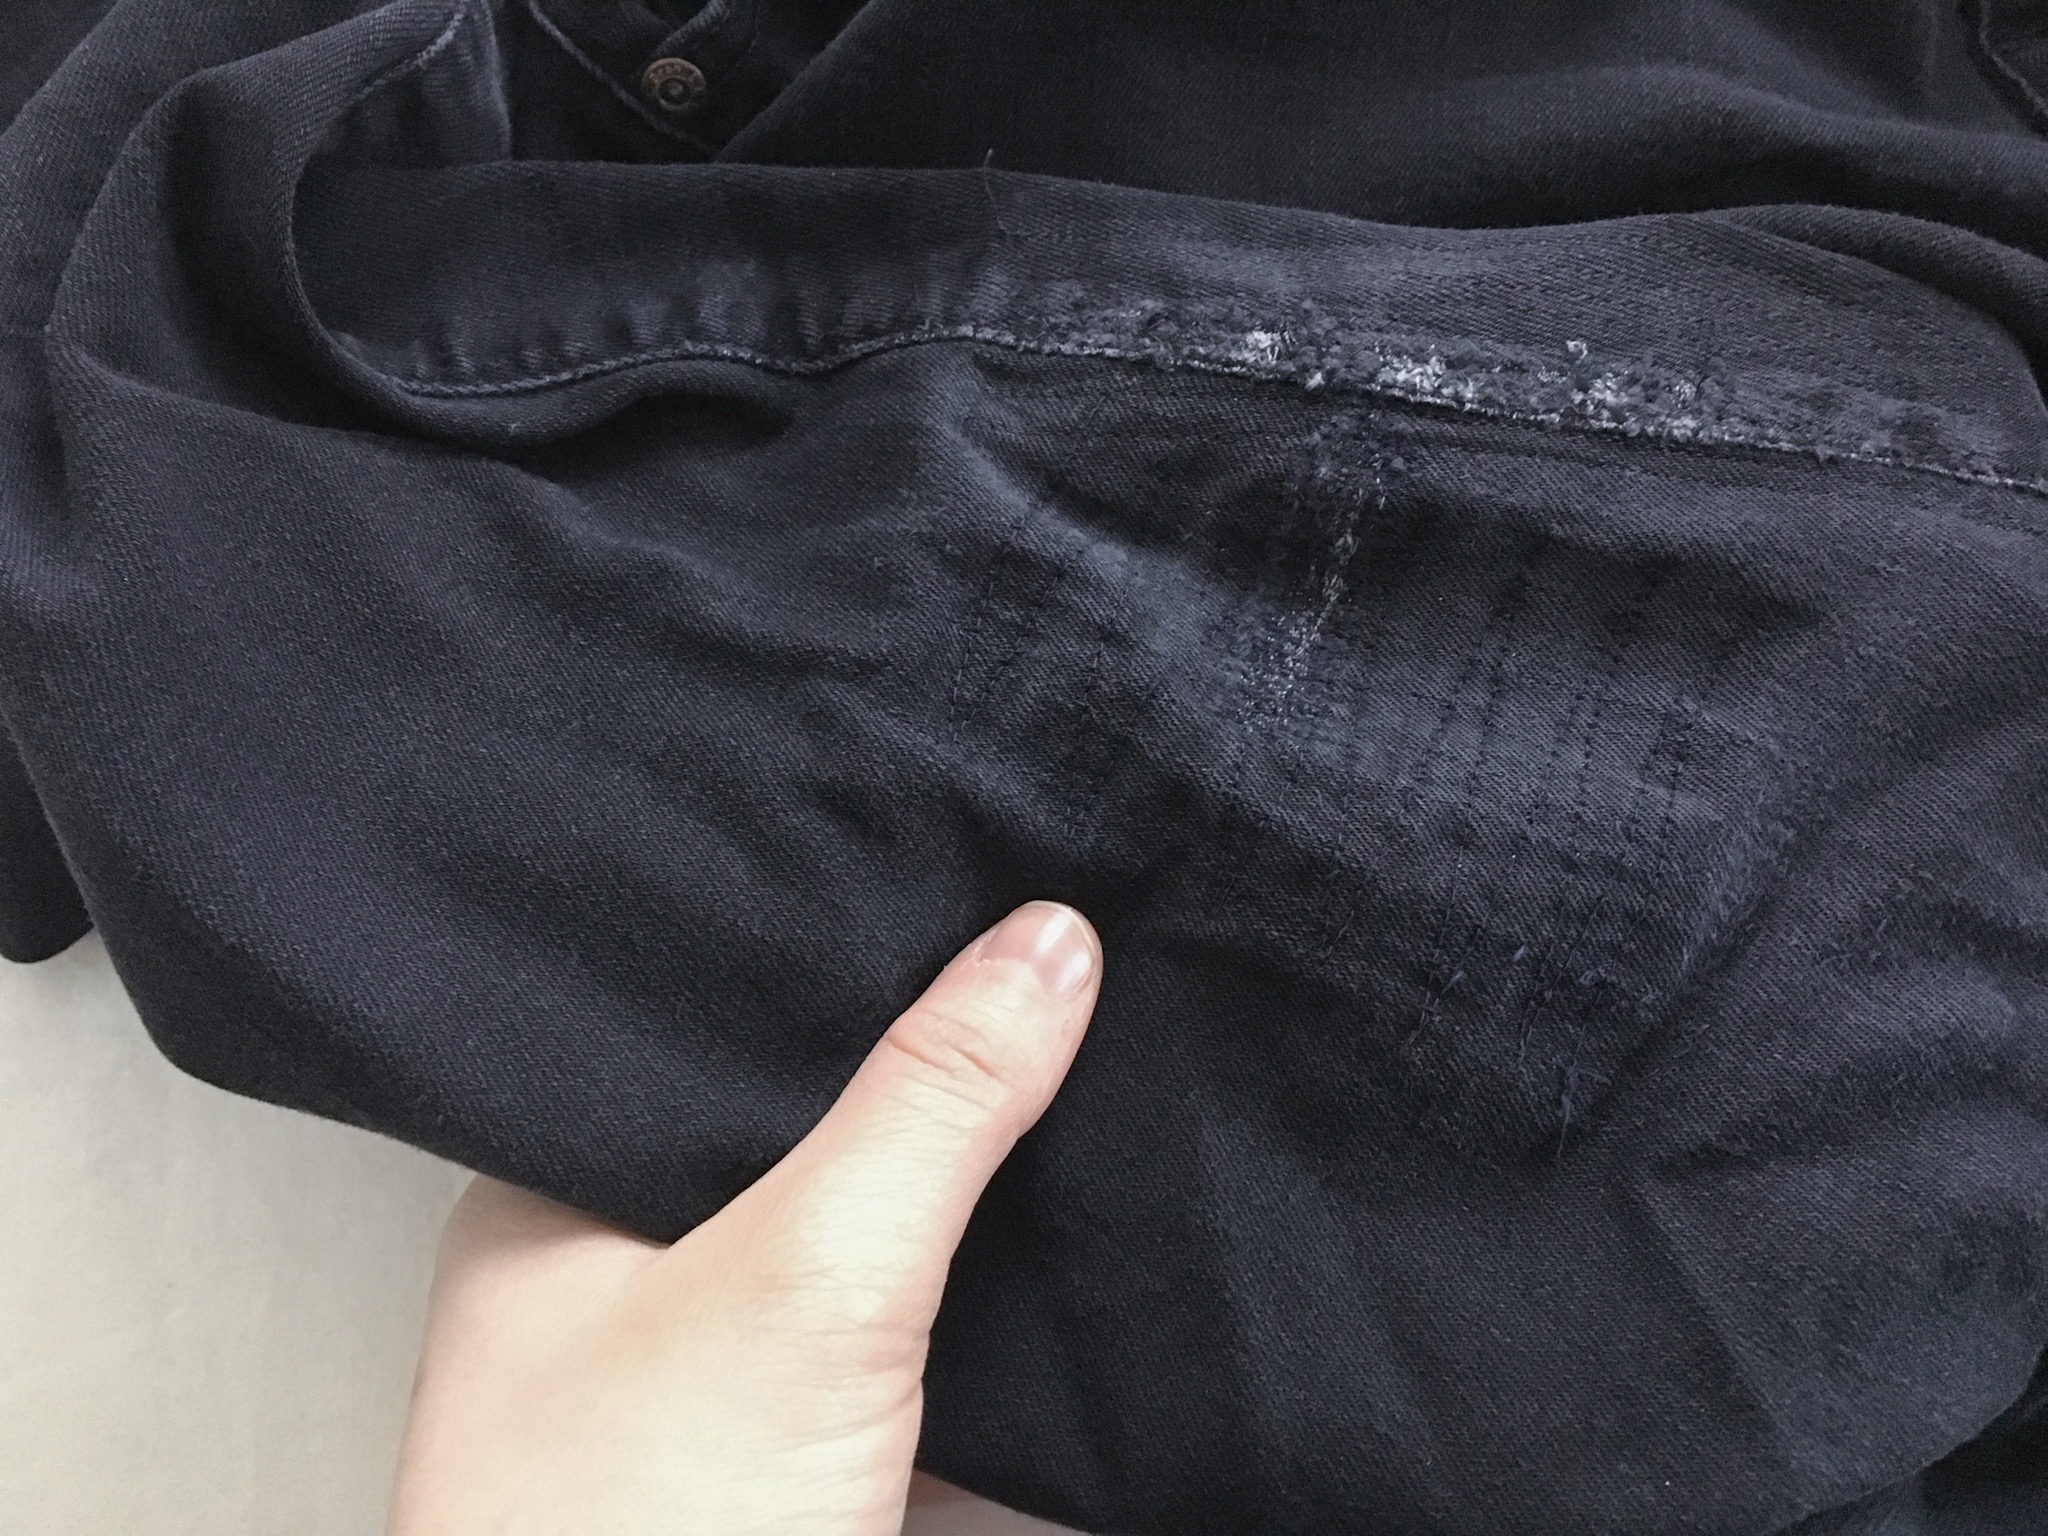
-Adding a patch. Like many women, my jeans wear through the inner thigh fairly quickly. Adding a patch is a simple fix to extend the life of your favorite item of clothing. HERE is a link to a tutorial I wrote about how to machine mend denim jeans. Lately I have been exploring sashiko patterns through mending; both indigo denim pairs I wear are very worn and require large patches. I opt for a more invisible approach for my black jeans.
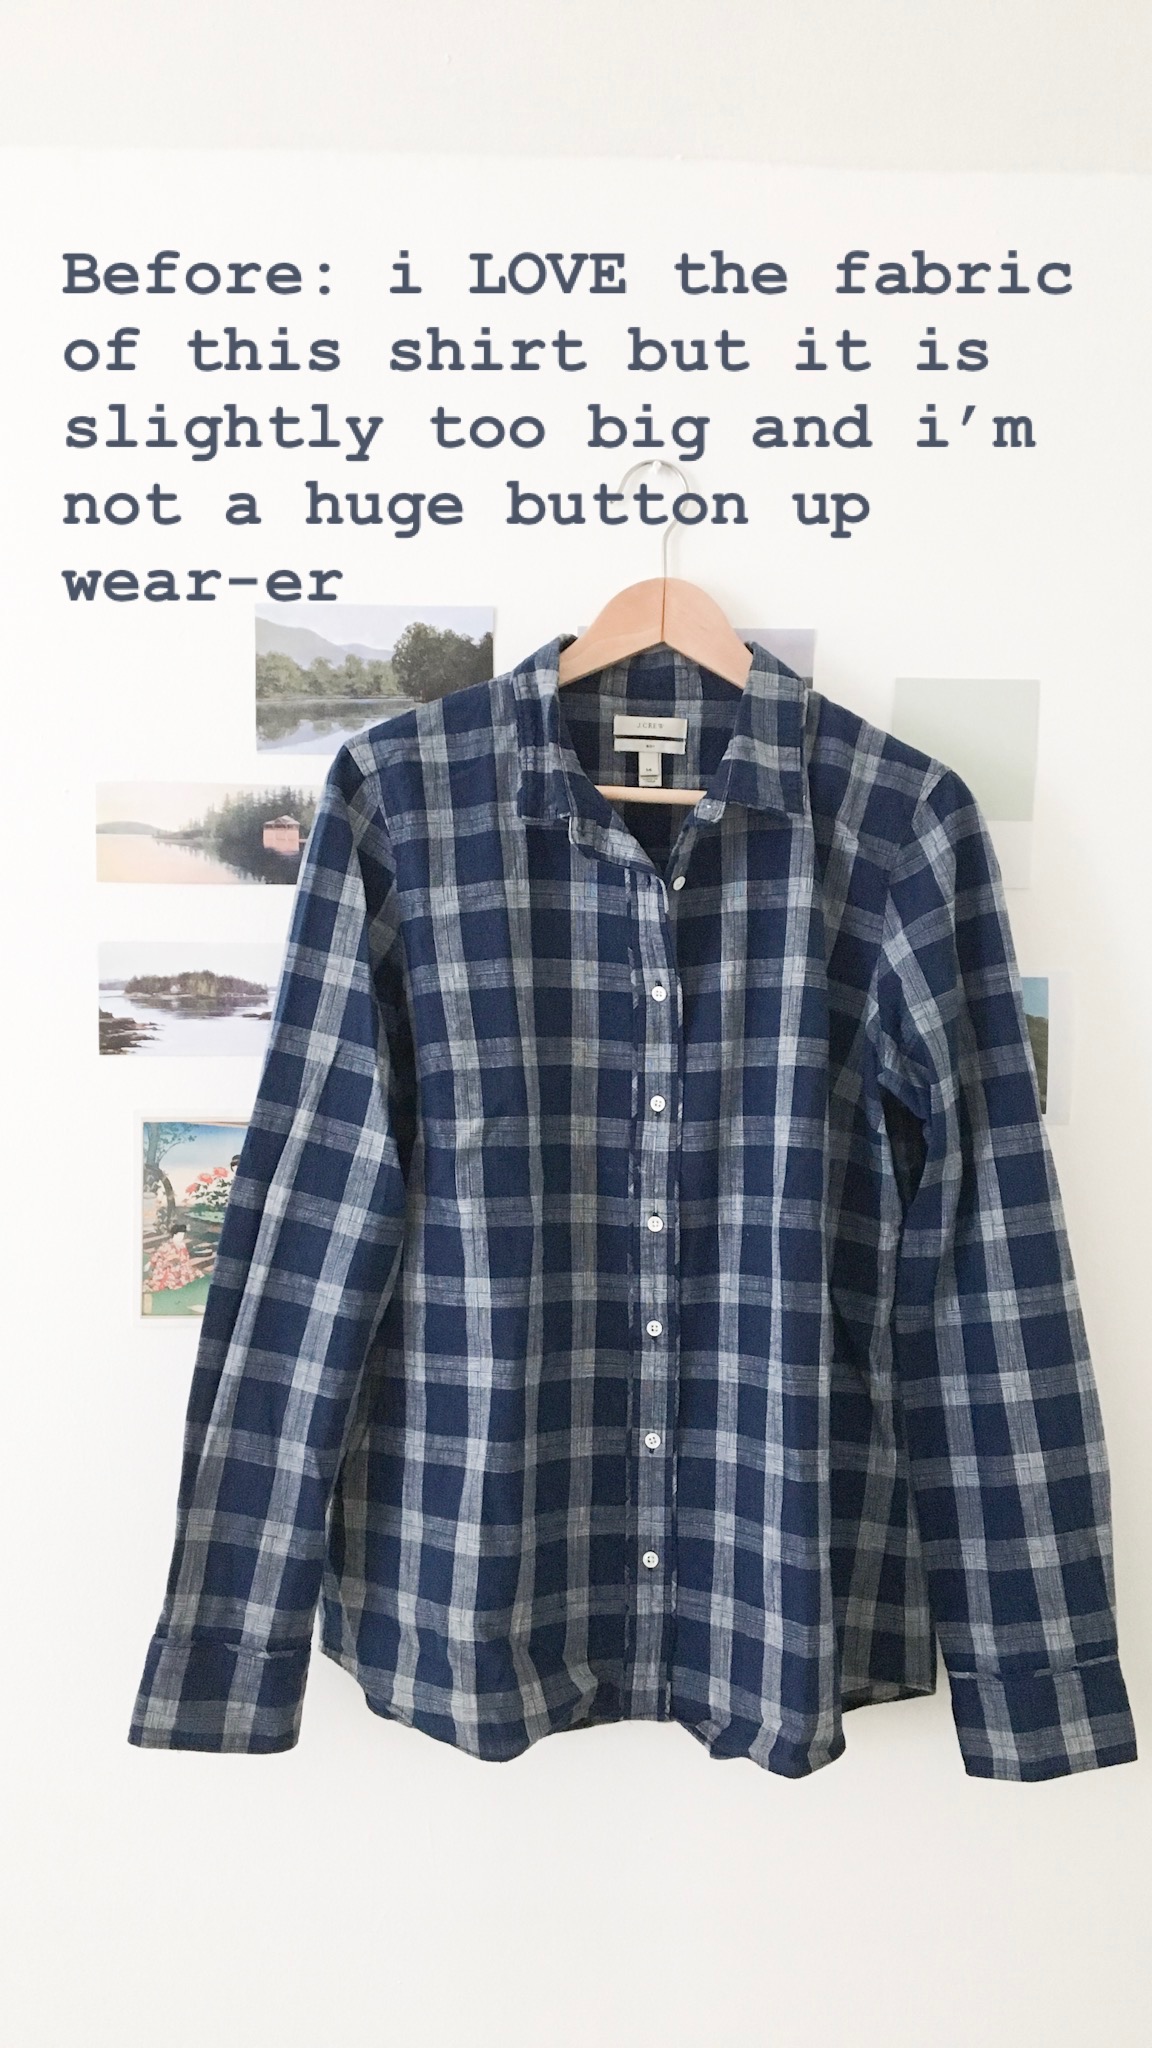
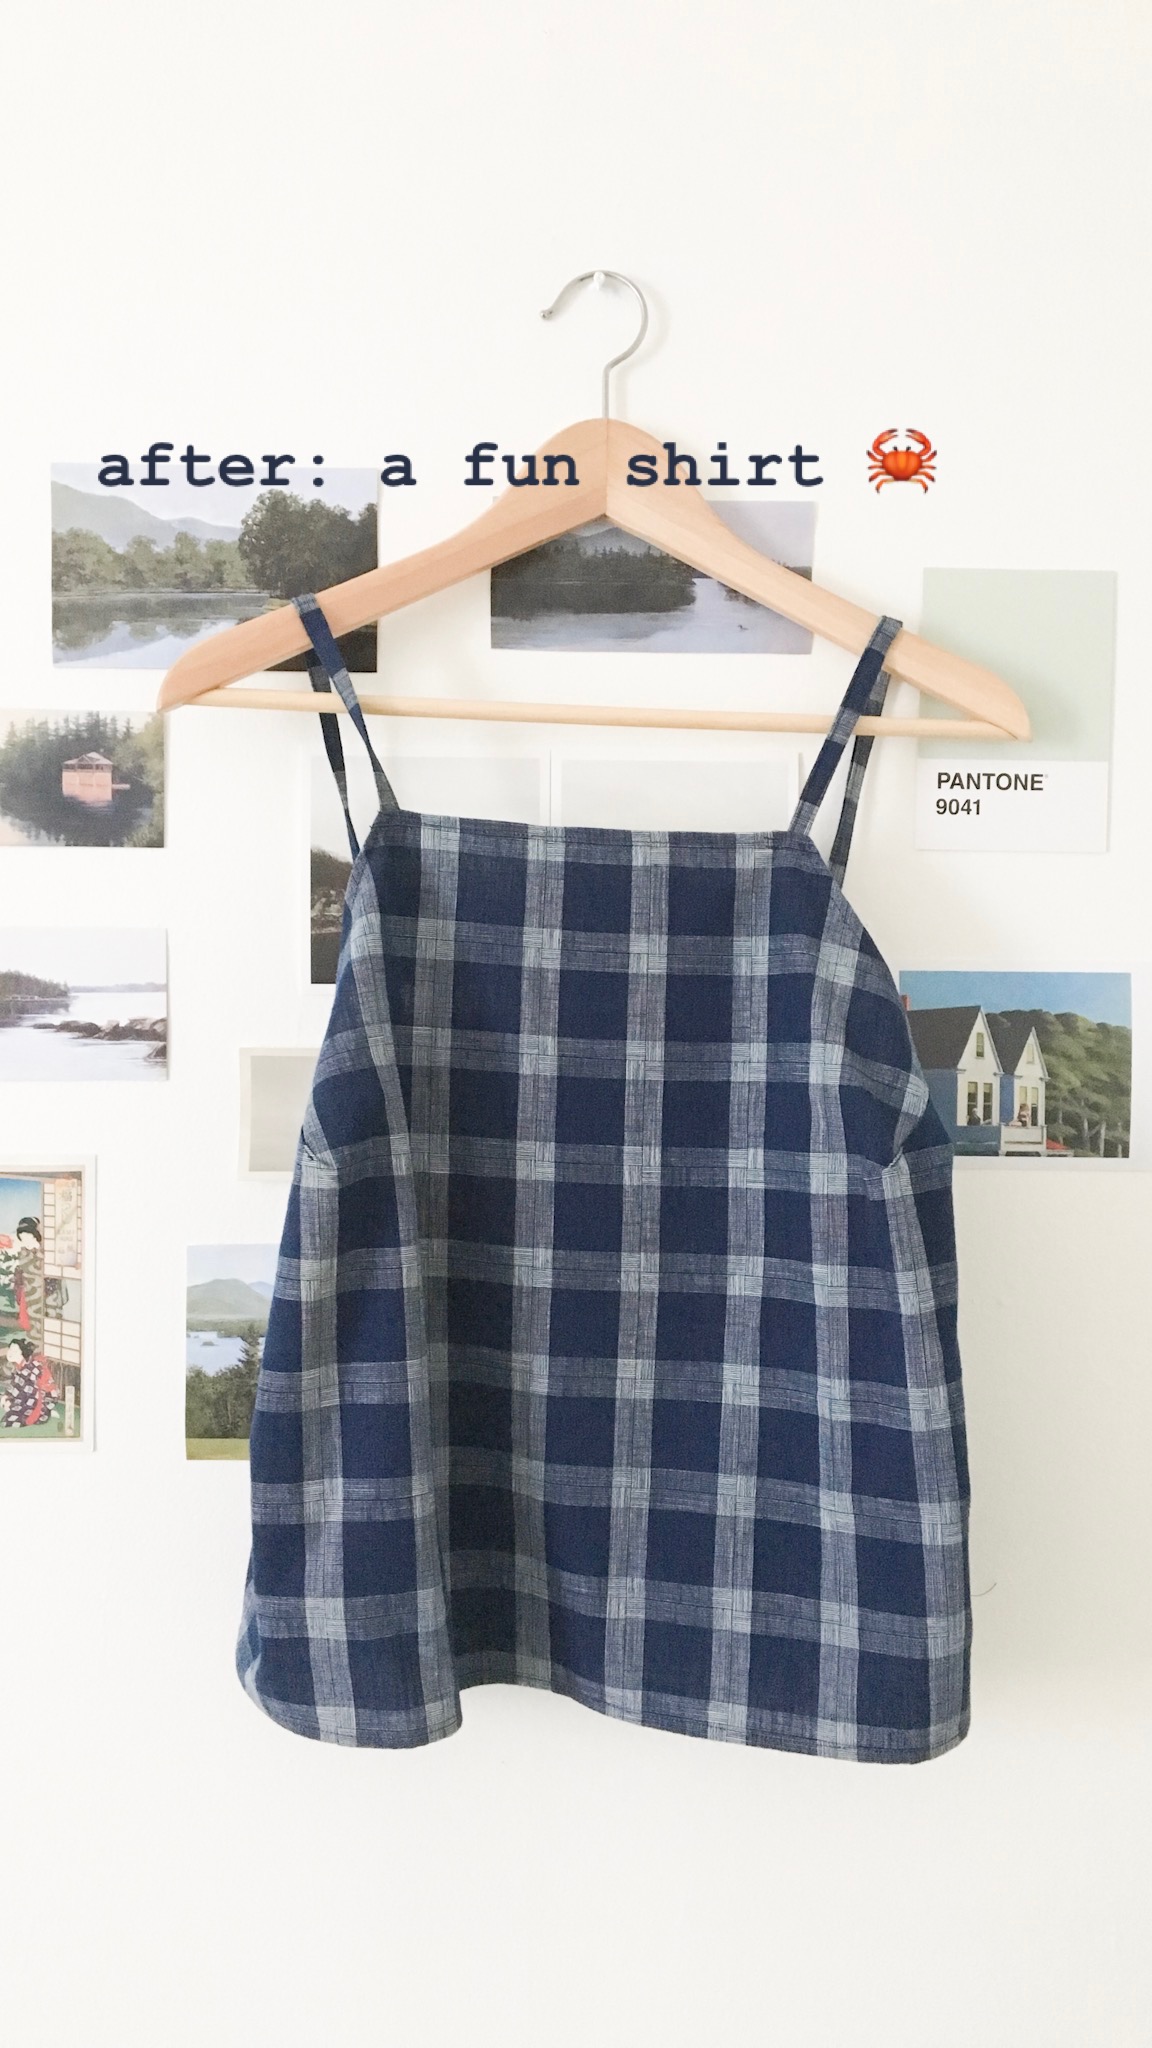
-The 180: button up to cropped top. I bought this button up because I was in love with the fabric... and I'm still in love with the fabric. I think I wore the shirt a fair amount when I bought it, but the past several years its been worn maybe a handful of times. It's slightly too big for me and I'm not a huge button up shirt fan. Because I had a fair amount of fabric to work with I decided to try my luck at turning the shirt into a tank. I used a Hackwith Design House piece as inspiration and patterned the shirt off of my own body and other clothing I have.